
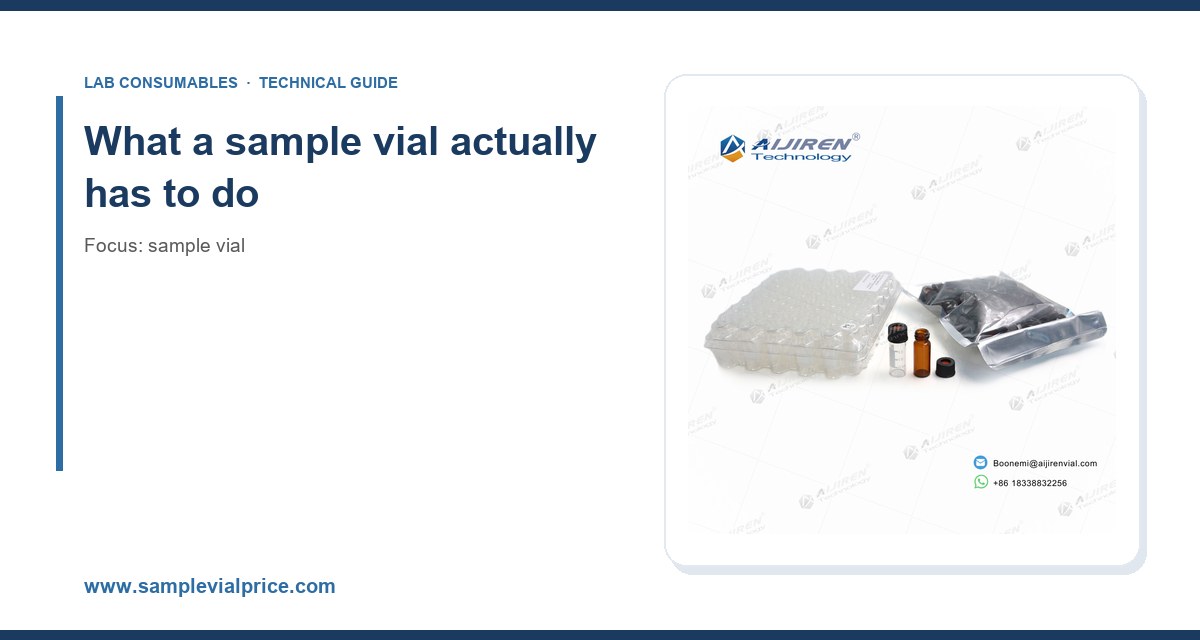
I have watched a lab manager save $9,000 in a year by switching from one brand of 2 mL autosampler vial to another that cost 40% less, and I have watched a different lab lose three weeks of instrument time because a batch of caps had septa that were 0.3 mm too thin. The vial is the cheapest thing on the bench and the most common cause of a failed sequence. After fifteen years of buying, specifying, and troubleshooting these parts, I have opinions about how to choose them, and most of those opinions came from cleaning up messes.
This guide is for the person who signs the purchase order and the person who loads the tray at 6 a.m. Both of you have the same problem: a catalog with hundreds of SKUs that all look identical in a photo. The differences live in dimensions you cannot see, in glass chemistry, in septum durometer, and in the tolerance stack between a vial, a cap, and the autosampler needle guide. Get those right and the vial disappears into the background. Get them wrong and it becomes the story of your week.
A vial is a container, a seal, and a mechanical interface. That is the whole job, and every failure mode traces back to one of those three roles.
As a container, it has to hold a defined volume with a known headspace, resist the chemistry inside it, and survive the temperature and pressure of the analytical method. As a seal, it has to keep volatile analytes in and ambient contamination out from the moment of capping to the moment of injection. As a mechanical interface, it has to sit in the autosampler tray at a repeatable height, present a septum at a repeatable depth, and let a needle penetrate without coring, bending, or pulling the septum into the vial.
Most buying decisions focus on the first role and ignore the other two. That is backwards. The container is a commodity. The seal and the interface are where money and time get lost. If you want the broad catalog view of what is available before you narrow down, the sample vial range is a reasonable place to start mapping the options, but keep the three roles in mind while you browse.
The dimensional facts that decide compatibility
Autosampler vials are not interchangeable across platforms, and the differences are measured in tenths of a millimeter. Here are the numbers that matter.
2 mL standard autosampler vials
The workhorse is the 12 x 32 mm vial, nominally 2 mL, with a 6 mm opening and an 11 mm crimp or screw neck. This is the format used by most HPLC and GC autosamplers from Agilent, Waters, Shimadzu, and Thermo. A few critical dimensions:
- Body diameter: 12.0 mm nominal, with a tolerance typically ±0.2 mm. Cheap glass can drift to 12.3 mm and bind in a 12.1 mm tray hole.
- Height: 32 mm nominal. A 32.5 mm vial can lift the tray or fail a height sensor.
- Neck finish: 11 mm for crimp and screw thread. The thread is not a standard pipe thread. It is a proprietary profile, which is why caps from one vendor often leak on vials from another.
- Bottom geometry: flat, rounded, or conical. Conical bottoms let you inject down to 50 to 100 µL of a 1.5 mL fill. Flat bottoms leave 200 to 300 µL behind.
9 mm screw thread vials
The 9 mm short screw thread is common on Agilent and some Shimadzu systems. It is not the same as the 11 mm screw thread, and mixing them is a guaranteed leak. The 9 mm format uses a smaller septum and a shallower cap, and the torque window is narrower because the thread is shorter.
Microvolume and high-recovery formats
When sample is scarce, the format changes. 300 µL and 700 µL vials with conical interiors are standard for LC-MS work where you have 50 µL of a precious extract. The 6 x 32 mm and 8 x 30 mm formats appear on systems with narrow needle guides. These are not interchangeable with 12 x 32 mm without a tray insert, and the insert changes the needle depth, so you have to re-teach the autosampler.
Crimp versus screw versus snap
Crimp caps give the most consistent seal because the crimping tool compresses the septum to a fixed dimension every time. The trade is that you need a crimper and a decapper, and a bad crimp is silent until the sequence fails. Screw caps are faster and re-openable but depend on torque. Snap caps are the fastest and the least reliable for volatile work.
| Cap style | Typical torque | Re-openable | Best for | Failure mode |
|---|---|---|---|---|
| Crimp, 11 mm | Tool-set, ~1.5 to 2.0 mm compression | No | Volatiles, long sequences, GC | Under-crimp leaks; over-crimp cores the septum |
| Screw, 9 mm | 0.5 to 0.8 N·m | Yes | General HPLC, re-injection | Under-torque leaks; over-torque splits the cap |
| Screw, 11 mm | 0.8 to 1.2 N·m | Yes | HPLC, sample prep | Thread mismatch with non-mating vials |
| Snap, 11 mm | None | Yes | Short runs, non-volatile | Partial seating, septum pushed in |
Those torque numbers are not decorative. A calibrated torque screwdriver costs about $80 and will eliminate a whole class of leak complaints. If your lab caps by hand and “feels” the torque, you have a variable in your method that nobody has written down.
Glass chemistry: the choice most buyers get wrong
Not all clear glass is the same, and the difference shows up in your blank chromatograms.
Type I borosilicate (borosilicate 3.3)
This is the default for analytical work. It has a low coefficient of expansion, good hydrolytic resistance (typically Class I per USP <660>), and it tolerates autoclaving and most aqueous buffers. It is the right choice for 90% of HPLC and GC applications. If a vendor cannot tell you the hydrolytic class of their glass, that is your answer about their quality system.
Type I amber glass
Amber glass blocks UV below about 500 nm and is mandatory for photosensitive analytes: vitamins, some antibiotics, catecholamines, and anything with a conjugated double bond that degrades under lab lighting. The trade is that you cannot visually inspect the contents. If you need to see the sample, use clear glass and wrap the tray.
Deactivated and silanized glass
Bare borosilicate has surface silanol groups that adsorb basic compounds and some proteins. For analytes like amines, quaternary ammonium salts, and peptides at low concentration, a deactivated surface (sometimes called silanized or “inert”) reduces adsorption and improves recovery. The premium is real, often 2 to 3 times the cost of standard glass, but if you are running a 10 ng/mL amine method and seeing 60% recovery, the vial is a suspect and deactivation is the fix.
When plastic is the right answer
For trace metal analysis, glass is the wrong container because it leaches sodium, calcium, boron, and silicon. Use polypropylene vials for ICP-MS and ICP-OES work, and check the leachables certificate. For PFAS analysis, polypropylene is also preferred, but you must confirm the vial is PFAS-free, because some polypropylene resins and mold release agents carry fluorinated residues. For HPLC with organic solvents, polypropylene can swell or leach oligomers, so glass remains the default.
Septum selection: the part that actually fails
If I could change one thing about how labs buy vials, it would be to make people specify the septum separately. The septum is the only part of the assembly that contacts the sample, the needle, and the headspace, and it is where most problems live.
Silicone
Excellent resealing, excellent chemical inertness, poor puncture resistance. A 1.0 mm silicone septum will reseal after 10 to 20 punctures in a single run and hold volatile analytes well. It is the right choice for GC headspace and for methods with a single injection per vial. It is the wrong choice for a 96-injection autosampler sequence, where the needle will tear it.
PTFE-faced silicone
The most common analytical septum. A thin 0.1 to 0.2 mm PTFE film faces the sample and the silicone provides the reseal. The PTFE face is chemically inert and stops the silicone from extracting into your sample. The trade is that PTFE does not reseal, so the silicone underneath has to do the work, and repeated punctures in the same spot eventually tunnel through. Typical rating is 50 to 100 punctures for a good laminated septum, but that number assumes the needle hits a different spot each time.
PTFE/silicone with a slit
Pre-slit septa let the needle pass without coring and are the standard for autosamplers that inject many times from one vial. The trade is that the slit is a leak path for volatiles, so pre-slit septa are a poor choice for GC headspace or long-term storage.
Butyl and EPDM
These are for pharmaceutical packaging and aqueous samples where silicone extractables are a concern. They reseal well but have higher extractables and are not the default for chromatography.
Durometer matters too. A 45 Shore A septum seats easily but can be pushed into the vial by a dull needle. A 55 to 60 Shore A septum resists push-through but needs a properly adjusted needle depth. If your autosampler has a needle that stops 1 mm above the bottom, a soft septum is fine. If it stabs deep, use the harder durometer.
Caps, seals, and the GPI thread question
The cap is not a trivial accessory. It sets the compression on the septum, and compression sets the seal.
Screw caps for 11 mm vials are often described as GPI 11 (Glass Packing Institute) thread, and the 9 mm format as GPI 9. The GPI designation describes the thread profile, but it is a nominal standard and vendors interpret it differently. In practice, a cap from vendor A may seal on a vial from vendor B and leak on a vial from vendor C. The only reliable test is to cap a batch and run a leak check, which I describe below.
Crimp caps come in aluminum with a choice of tear-off or flip-off tops. The aluminum grade matters: a soft alloy deforms under the crimper and gives an inconsistent seal, while a harder alloy can crack at the skirt. Magnetic caps, which let the autosampler move the vial with a magnet instead of a gripper, are worth the premium on robots that drop vials. If you are buying caps and vials as a set, buying them from the same supplier removes the thread-mismatch variable, which is why a matched vials with caps configuration is the lower-risk purchase for a new method.
Seal integrity test you can run today
Fill ten vials with a volatile marker (methanol spiked with a known concentration of an internal standard), cap them with the lot you are evaluating, and weigh them on a balance readable to 0.1 mg. Store at room temperature for 24 hours and reweigh. A loss of more than 0.5 mg per vial indicates a seal problem. This test takes an hour and has caught more bad lots than any certificate of analysis.
Matching the vial to the instrument and the method
The autosampler is the constraint. Before you buy anything, answer these questions about your system.
- What is the tray format? 12 x 32 mm, 9 mm screw, or a microplate? The tray defines the maximum body diameter and height.
- What is the needle depth and guide geometry? A deep needle with a narrow guide will not clear a wide crimp cap skirt.
- Does the system grip or magnetically lift? Magnetic caps and steel trays are a matched pair.
- What is the injection volume and the residual volume? If you inject 1 µL from a 100 µL fill, you need a conical bottom and a needle that reaches it.
- Is the method volatile-sensitive? Headspace GC and any method with a low-boiling analyte need crimp or a high-quality screw seal, not a snap cap.
For the instrument-side details, the vendor documentation is the authority. Agilent publishes tray and needle specifications for its autosamplers alongside its chromatography consumables and columns, and Thermo Fisher documents its chromatography and sample handling formats the same way. Read the autosampler manual before you read the vial catalog. It will save you a return shipment.
Regulatory and method context
If your lab works under a regulated method, the vial is part of the method and changing it requires a documented justification. Environmental work under EPA SW-846 specifies sample containers and preservation for many methods, and the vial material and closure are part of that specification. Pharmaceutical work under USP <660> covers glass containers and their hydrolytic resistance, and USP <661> covers elastomeric closures, which is where septum extractables get addressed. If you are validating a method, the vial and septum should appear in your validation report as a controlled material with a defined part number and a defined lot.
For practical method-development guidance on vial-related artifacts, the technical notes from column and consumable vendors are more useful than the regulations. Restek’s technical resources for chromatography include application notes on septum bleed, inlet contamination, and vial adsorption that I have cited in more than one internal investigation.
Buying criteria with numbers
Here is the checklist I use when qualifying a new vial and cap supplier. Score each line, and do not approve a supplier that fails the starred items.
| Criterion | Target | How to verify |
|---|---|---|
| *Body diameter | 12.0 ±0.2 mm | Calipers on 20 vials from the lot |
| *Height | 32.0 ±0.3 mm | Calipers on 20 vials |
| *Neck finish | Matches cap thread, no cross-threading | Cap 20 by hand, inspect for shavings |
| Glass hydrolytic class | USP Type I | Supplier certificate |
| Septum thickness | 1.0 mm ±0.1 mm | Calipers on 10 septa |
| Septum durometer | 55 ±5 Shore A | Supplier certificate or durometer |
| Puncture rating | ≥50 punctures, no coring | Run 50 injections, inspect septum |
| Seal integrity | <0.5 mg loss in 24 h | Gravimetric test above |
| Extractables | Below method LOQ | Blank injection, 6 replicates |
| Lot traceability | Lot number on every box | Inspect packaging |
| Price per vial | Benchmark against current | Quote at 10k and 50k quantities |
The starred rows are the ones that cause instrument downtime. Everything else causes rework. Both matter, but downtime is more expensive.
Operational precautions that prevent most failures
Good hardware does not survive bad handling. These are the practices I enforce in every lab I have run.
Never touch the septum face
Finger oils and skin cells are extractables. Handle caps by the skirt, and if you must orient a septum, use tweezers. A single fingerprint on a septum can produce a ghost peak in a sensitive LC-MS method.
Fill to a defined volume, not “about half”
Headspace affects volatilization and, in headspace GC, the partition coefficient. Define the fill volume in the method (for example, 1.0 mL in a 2 mL vial) and use a repeater pipette. A 0.2 mL variation between vials is enough to shift peak areas by several percent.
Respect the torque window
Use a calibrated torque screwdriver set to 0.8 N·m for 11 mm screw caps and 0.6 N·m for 9 mm. Re-check the setting monthly. A screwdriver that has drifted to 1.5 N·m will crack caps and split septa, and the failure will look like a bad lot.
Service the crimper
Crimp jaws wear. Measure the crimp height on a capped vial with calipers (typically 5.5 to 6.0 mm for an 11 mm aluminum seal) and compare to the tool specification. Replace jaws when the height drifts by more than 0.2 mm. A worn crimper produces a seal that looks fine and leaks slowly.
Store capped vials upright and cold
Volatiles migrate through septa over time, and the rate depends on temperature. If your autosampler tray sits at ambient for a 12-hour sequence, the last vial is not the same sample as the first. Use a cooled tray if the method is volatile-sensitive, and validate the hold time.
Do not reuse vials
I have seen labs wash and reuse glass vials to save money. The savings are illusory. Detergent residue, scratched interiors, and deformed necks cause more failures than the vials cost. Reuse is a false economy in any regulated environment.
Troubleshooting checklist
When a sequence fails, work through this list in order. It is sorted by how often each cause is the actual culprit in my experience.
- Ghost peaks or rising baseline. Septum bleed or extractables. Swap to PTFE-faced silicone, run a blank with a new lot, and check the inlet liner for septum fragments.
- Low recovery of basic or polar analytes. Adsorption on active glass. Try deactivated vials and compare recovery on a 10 ng/mL standard.
- Peak area drift across a sequence. Evaporation through the septum or an uncapped vial. Run the gravimetric seal test and check cap torque.
- Needle bends or clogs. Septum coring or a vial that is too tall for the tray. Inspect the septum for a plug and check vial height with calipers.
- Autosampler “vial not found” errors. Body diameter out of tolerance or a label that has shifted. Caliper the lot and check label placement.
- Leaks around the cap. Thread mismatch between vial and cap, or under-torque. Cap a vial from the same lot with a known-good cap and compare.
- Contamination in trace metals. Glass leaching. Switch to polypropylene and run a leachables check.
- PFAS false positives. Fluorinated residues in plastic vials or septa. Use PFAS-free certified vials and run a system blank.
If you are sourcing a full replacement set, the chromatography supply catalogs from chromatography products distributors and the manufacturer documentation from Aijiren are useful for cross-referencing part numbers against your instrument’s tray specification. Cross-referencing is how you avoid buying a vial that fits the tray but not the needle guide.
Cost per injection, not cost per vial
Buyers compare price per vial. Operators should compare cost per successful injection. Do the arithmetic on a real example.
A standard 2 mL clear screw vial with a PTFE/silicone cap might cost $0.18. A premium deactivated vial with a laminated septum might cost $0.45. On a 500-injection batch, that is a difference of $135. Now price the failure: a single lost sequence costs the instrument time (say 6 hours at $80/hour), the analyst time to investigate (4 hours at $45/hour), and the sample, which may be irreplaceable. That is over $600 before you count the re-run. If the premium vial prevents one failed sequence per 500 injections, it pays for itself four times over.
The same logic applies to caps. A cap that costs $0.02 less but leaks on 1% of vials is not cheaper. It is a liability with a part number.
My recommendation
For a general HPLC or GC lab running 12 x 32 mm vials, specify the following as your default and keep a small stock of the alternatives for special cases.
- Vial: 12 x 32 mm, USP Type I clear borosilicate, 11 mm screw neck, conical bottom for low-volume work, 1.5 mL working volume.
- Cap: 11 mm screw, PTFE-faced silicone septum, 1.0 mm thick, 55 Shore A, pre-slit only if the method is not volatile-sensitive.
- Torque: 0.8 N·m, calibrated screwdriver, checked monthly.
- Septum rating: plan for 50 punctures per vial and change vials before that, not after.
- Special cases: amber glass for photosensitive analytes, deactivated glass for basic compounds and peptides below 100 ng/mL, polypropylene for trace metals and PFAS, crimp caps for headspace GC and long sequences.
Buy vials and caps as a matched set from one supplier, qualify the lot with the caliper and gravimetric tests above, and write the part number into the method. The vial is a controlled material, and treating it like one is the difference between a quiet instrument and a recurring investigation.
The cheapest vial that passes your qualification is the right vial. The most expensive vial that fails it is the most expensive thing in the lab. Run the tests, write down the numbers, and let the data pick the SKU.
References & further reading
Related resources from our lab consumables network:
- Sample Vial at samplevialprice.com
- Chromatography Products at chromatographyselling.com
- Aijiren at aijirentech.com
- Vials With Caps at vialswithcaps.com
External references and standards: