
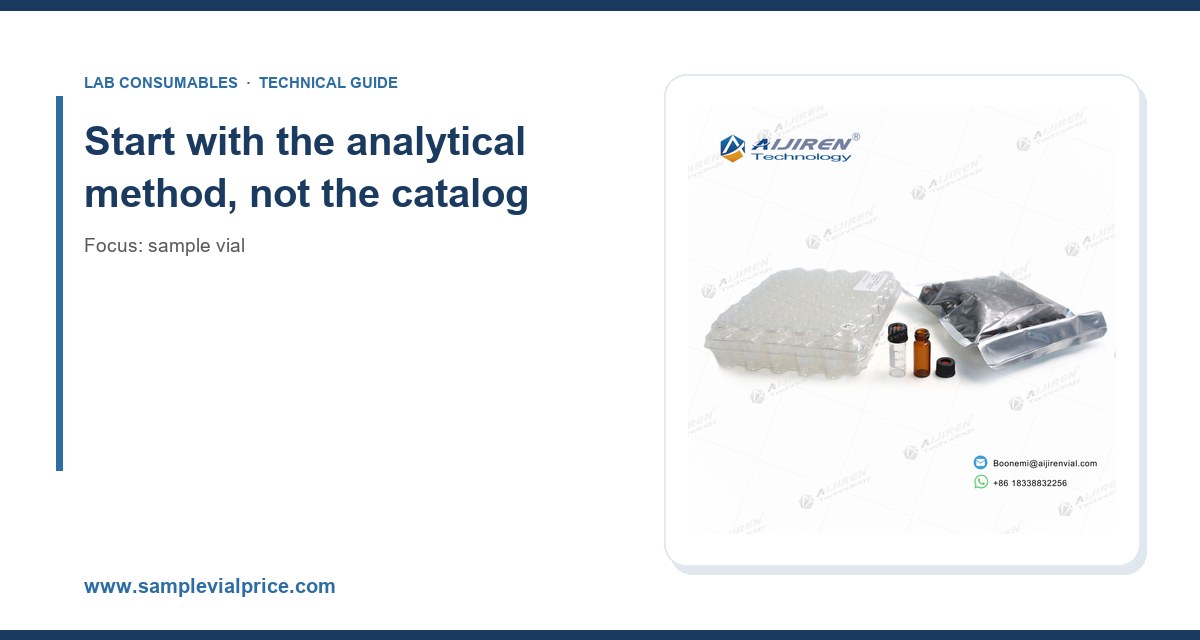
I have watched a lab technician push a 12 x 32 mm vial into a 9 mm autosampler tray, force the cap down, and wonder why the needle bent on the first injection. The vial was fine. The cap was fine. The problem was a 6 mm throat opening mated to a 9 mm crimper, and nobody had checked the neck finish before the order went out. That single mismatch cost a day of instrument uptime and a $180 needle. Most vial selection failures are that mundane, and most of them are preventable with a spec sheet, a caliper, and ten minutes of planning.
This guide covers what actually matters when you specify sample vials: glass chemistry, neck finish, dimensional tolerances, septa, caps, temperature and pressure limits, autosampler compatibility, and the cost per injection that nobody calculates until the annual budget review. I will use real numbers from working specs and name the failure modes I have seen on benches.
Vials are a consumable, but they sit inside an analytical chain. Before you open a catalog, write down four things: the instrument and autosampler model, the injection volume, the sample solvent, and the maximum and minimum temperature the vial will see from filling to injection.
Those four answers eliminate most of the catalog. A 2 mL vial at 10 µL injection on an Agilent 7693A tray has different requirements than a 1.5 mL vial on a Thermo TriPlus RSH running headspace, and both differ from a 300 µL vial on a Waters ACQUITY with a 50 µL syringe. The autosampler defines the geometry. The method defines the chemistry.
What the autosampler actually constrains
Autosamplers grip vials by the cap flange or the body, lift them, and drive a needle through the septum to a fixed depth. That imposes hard limits:
- Vial height must match the tray pocket. A 32 mm body is standard for 2 mL; a 38 mm body will not seat in a 32 mm tray.
- Cap diameter must clear the gripper jaws. Standard 9 mm crimp caps measure about 11.0 to 11.3 mm across the flange; 11 mm snap caps run about 13.0 mm. Mixing them jams the handler.
- Septum thickness sets needle penetration depth. A 1.0 mm silicone septum and a 1.5 mm silicone/PTFE sandwich behave differently at the same needle stop.
- Neck inner diameter controls how far the needle can wander before it hits glass. A 6 mm neck (for 8 mm crimp) leaves less margin than a 9 mm neck.
If you are running more than one instrument platform, standardize on 12 x 32 mm, 9 mm neck vials with 9 mm caps. That single decision covers most HPLC and GC autosamplers from Agilent, Thermo Fisher, Shimadzu, and Waters. The exceptions are headspace (20 mL crimp), SPME (specialty), and micro-volume work (6 mm or 8 mm neck).
Glass chemistry: type I, type II, and why it matters
Nearly all sample vials are borosilicate glass, but not all borosilicate is equal. USP <660> defines glass types by hydrolytic resistance, and the type matters when your analyte is pH-sensitive, metal-sensitive, or present at low ng/mL.
Type I borosilicate (expansion 3.3)
Type I glass has a borosilicate composition with a coefficient of linear expansion around 3.3 x 10⁻⁶ /°C. It resists hydrolysis, tolerates autoclaving, and does not leach alkali at meaningful rates. This is the default for HPLC, LC-MS, and trace metals work. If a supplier cannot quote USP <660> Type I on the certificate, ask why.
Type II and “dealkalized” soda lime
Type II is soda lime glass that has been surface-treated to remove alkali. It is cheaper and acceptable for pH-neutral aqueous samples, but the treated layer can be breached by repeated washing or by strongly acidic solvents. For a pH 2 mobile phase sitting in a vial for 24 hours, I would not use Type II.
Amber vs clear
Amber glass blocks UV below about 500 nm and protects light-sensitive analytes (vitamins, some pharmaceuticals, polyphenols). The trade-off is that you cannot visually inspect the sample for particulates or phase separation. If your method requires visual inspection, use clear glass and shield the tray.
Low-adsorption and silanized glass
For proteins, peptides, and some basic drugs, bare borosilicate adsorbs analyte to the wall. Silanized (deactivated) vials reduce this. In my experience the effect shows up as a 5 to 15 percent drop in recovery for hydrophobic peptides at low concentrations. If you see falling response across a run, test a deactivated vial before you blame the column.
Neck finish and cap systems: the compatibility matrix
This is where most buyers get burned. The neck finish is defined by the outer diameter of the neck and the thread or crimp geometry. There are three families you will encounter, and they do not interchange.
Crimp neck (9 mm, 11 mm, 20 mm)
A crimp vial requires an aluminum seal that is deformed over the neck flange with a crimper. The 9 mm crimp is the workhorse for 2 mL autosampler vials. The 11 mm crimp is used on larger vials and some headspace formats. The 20 mm crimp is the standard for 20 mL headspace vials per the EPA SW-846 headspace methods.
Crimp seals give the best seal integrity and the lowest septum coring when the crimper is set correctly. The catch is the crimper. A properly set 9 mm crimper produces a seal with a flange diameter of about 11.0 mm and a crimp height that compresses the septum by roughly 30 to 40 percent. Too loose and you leak; too tight and you crush the septum and core it. I have seen crimpers drift 0.2 mm over a few thousand cycles, which is enough to start coring. Check the crimp with a go/no-go gauge every shift.
Snap or screw top (9 mm short thread, 9 mm long thread)
Screw-thread vials use a cap with a matching thread. The 9 mm short-thread (sometimes called 9-425) is the most common. The 9 mm long-thread is a different pitch and will not seal on a short-thread vial. This is the single most common ordering error I have seen: a lab buys long-thread caps for short-thread vials, the caps go on but leak, and the autosampler reports short injections.
Screw caps are easier to handle and re-seal, which makes them popular for sample preparation and short-term storage. Their weakness is torque consistency. Under-torque and the septum does not compress; over-torque and you distort the cap and crack the neck. For 9 mm screw caps, 0.5 to 1.0 N·m is a reasonable target; most hand-tightening lands around 0.7 N·m. If you are capping hundreds of vials a day, use a torque-limiting driver and verify with a torque tester monthly.
Snap caps
Snap caps push onto a neck with a retaining bead. They are fast and need no tool, but they offer less seal integrity and are not suitable for volatile solvents or long-term storage. Use them for short runs on instruments that accept them, not for anything that will sit in a tray overnight.
Comparison table: cap systems at a glance
| System | Neck OD | Typical use | Seal integrity | Tool needed | Re-sealable |
|---|---|---|---|---|---|
| 9 mm crimp | 9 mm | 2 mL HPLC/GC autosampler | Highest | Yes (crimper) | No |
| 11 mm crimp | 11 mm | Larger vials, some headspace | High | Yes | No |
| 20 mm crimp | 20 mm | 20 mL headspace | High | Yes | No |
| 9 mm short thread | 9 mm | 2 mL autosampler, prep | Good | No | Yes |
| 9 mm long thread | 9 mm | Specific instruments | Good | No | Yes |
| Snap cap | 11 mm | Short runs | Moderate | No | Limited |
Septa: the part that actually touches your sample
The septum is a silicone disc, usually faced with PTFE on the sample side, that the needle penetrates. It is the most under-specified component in most vial purchases and the one most likely to cause problems.
Silicone/PTFE sandwich
The standard septum is a silicone core with a PTFE film on the sample side. The PTFE prevents the sample from contacting silicone, which matters for volatile and reactive analytes. The silicone provides resealability. Thickness is typically 1.0 mm for 9 mm caps and 1.5 mm for 11 mm caps. A 1.0 mm silicone/PTFE septum will reseal after roughly 3 to 5 punctures if the needle is sharp and the crimp is correct. After that, coring and leakage climb.
Pre-slit septa
Pre-slit septa have a small cut that the needle passes through without tearing. They are excellent for autosamplers that inject many times from one vial, and for headspace where you want a clean penetration. The trade-off is evaporation. A pre-slit septum on a volatile solvent can lose measurable volume over 8 hours at room temperature. If your run is longer than a few hours and the solvent is volatile, use a solid septum and accept fewer punctures per vial.
Puncture counts and when to change vials
Here is the number that changes purchasing behavior: a standard 1.0 mm silicone/PTFE septum is good for 3 to 5 punctures. A pre-slit septum is good for 10 to 20. A 1.5 mm septum on an 11 mm cap is good for 5 to 8. If your method injects 10 times from one vial, you need a pre-slit septum or a fresh vial. If you are running a 96-well plate equivalent of 2 mL vials, plan the vial count per run accordingly. Buying the cheapest septum and replacing vials after 3 injections is often more expensive than buying pre-slit septa and injecting 15 times.
Coring and needle damage
Coring happens when the needle punches a plug of silicone into the vial or drags it into the needle. Symptoms: a visible silicone fragment in the vial, a rising baseline, ghost peaks, and eventually a blocked needle. Causes: dull needle, over-crimped cap, septum too thick for the needle stop, or a needle that enters at an angle because the vial is not seated. Check the needle bevel and the crimp height first.
Temperature, pressure, and solvent compatibility
Vials are rated for a temperature range, and the rating usually refers to the glass, not the cap and septum. The cap and septum are the weak link.
Temperature limits
Borosilicate glass is fine to 500 °C for short excursions and to about 150 °C continuously without issue. The septum is the limit. Standard silicone/PTFE septa are rated to about 200 °C for short periods, but the PTFE film can degrade and the silicone can outgas above 150 °C. For high-temperature GC or headspace at 150 to 200 °C, use a high-temperature septum (often a silicone with a thicker PTFE face) and verify with a blank run. For cryogenic work, the glass is fine; the cap can become brittle and crack if it is a cheap polypropylene.
Pressure limits
A crimp seal on a 9 mm vial holds to roughly 1.5 to 2 bar before it vents. Screw caps hold less, often around 1 bar, unless you use a cap with a bonded septum. If your method involves pressurization (some headspace and derivatization protocols), specify a crimp seal and pressure-test a sample. Never autoclave a sealed vial; the pressure will deform the cap and the vial can fail.
Solvent compatibility
PTFE is compatible with almost everything, including strong acids, bases, and most organic solvents. The silicone core is not. If the PTFE film is scratched or the needle cores the septum, the sample contacts silicone and you can get swelling, extraction of oligomers, and adsorption. For aggressive solvents (DMSO, THF, concentrated acids), inspect septa before use and consider a PTFE-faced septum with a thicker film.
Volumes, formats, and the cost per injection
Vial volume is not the same as usable volume. A 2 mL vial holds about 1.5 mL comfortably; fill it to 1.8 mL and the autosampler needle may not reach the liquid if the vial is not bottom-crimp. A 1.5 mL vial holds about 1.2 mL. A 300 µL vial holds about 250 µL. Choose the smallest vial that leaves enough headspace for the needle and enough volume for the injection plus dead volume.
Micro-volume and inserts
For injections under 50 µL, use a 300 µL vial or a 2 mL vial with a 150 µL glass insert. Inserts add a part number and a handling step, but they let you run a 20 µL sample without wasting 1.5 mL of it. If your sample is precious, the insert pays for itself on the first run.
The cost per injection calculation
Most buyers compare vial price per thousand. That is the wrong metric. The right metric is cost per injection, and it includes the cap, the septum, the labor to cap, and the cost of a failed injection.
Example: a 2 mL clear vial costs $0.08, a 9 mm crimp cap with septum costs $0.06, and the labor to crimp is about 6 seconds at a $30/hour loaded rate, or $0.05. Total per vial: $0.19. If the septum is good for 4 injections, cost per injection is about $0.05. A pre-slit septum costs $0.02 more but supports 15 injections: $0.21 per vial, or $0.014 per injection. The cheaper septum is three times more expensive per injection. Multiply by 50,000 injections a year and the difference is real money.
Add the cost of a failed run: one re-injection of a 96-vial batch at 20 minutes per injection is over 30 hours of instrument time. A $0.02 septum upgrade is cheap insurance.
Autosampler-specific selection notes
Different platforms have quirks. These are the ones I have dealt with directly.
Agilent 7693A and 7683B
These use 9 mm crimp or 9 mm screw-top vials in a 32 mm tray. The gripper is tolerant, but the needle stop is set by the vial height. Use 12 x 32 mm vials with a flat bottom. Bottom-crimp vials can sit slightly higher and cause the needle to stop short.
Thermo TriPlus and AS/ASH
The TriPlus RSH uses a magnetic tray and is sensitive to cap diameter. A cap that is 0.2 mm oversized can fail to seat. Verify the cap flange diameter against the tray spec. The AS/ASH series is more forgiving but still requires the correct neck finish.
Waters and Shimadzu
Both accept 12 x 32 mm, 9 mm neck vials. Waters total recovery vials have a specific neck geometry; substituting a generic vial can change the needle depth. If you are on a Waters platform, buy the total recovery format or verify the neck dimensions.
Supplier and quality checks before you commit
Vials are commodity parts, but the tolerances are not. A cheap vial with a 0.3 mm height variance will jam a tray. Ask for the dimensional certificate and check these numbers:
- Body diameter: 12.00 ± 0.10 mm for 2 mL vials.
- Height: 32.00 ± 0.20 mm.
- Neck OD: 9.00 ± 0.10 mm for 9 mm crimp.
- Cap flange diameter: 11.0 to 11.3 mm for 9 mm crimp caps.
- Septum thickness: 1.00 ± 0.05 mm for 9 mm caps.
- Glass type: USP <660> Type I borosilicate.
Also ask for the lot-to-lot dimensional report and the septum durometer (typically 40 to 50 Shore A for silicone). A supplier that cannot provide these is selling you a part number, not a specification. For a broader catalog of vials and caps, see Sample Vial and the cap and seal range at Vials With Caps. If you are sourcing chromatography consumables alongside vials, the product listings at Chromatography Products are a useful cross-reference, and manufacturers such as Aijiren publish dimensional data you can compare against your instrument spec. For method-level context on septa and injection, the technical notes at Restek are worth reading before you finalize a purchase order.
Troubleshooting checklist
When a run goes wrong, work through this list in order. In my experience, 80 percent of vial-related failures are in the first four items.
- Leak or short injection: check cap torque (0.5 to 1.0 N·m for screw caps) and crimp height (go/no-go gauge). Verify the cap thread matches the vial thread (short vs long).
- Coring or silicone fragments: inspect the needle bevel, check crimp height, verify septum thickness against the needle stop, and replace the septum if it is over 5 punctures.
- Ghost peaks or rising baseline: run a blank vial with the same septum and cap. If the blank shows peaks, the septum is outgassing or the vial was contaminated. Try a PTFE-faced septum and a solvent rinse.
- Needle bending or jamming: check vial height against the tray spec, verify the vial is seated, and check for a bent tray. A 0.3 mm height variance can cause this.
- Low recovery of protein or peptide: test a silanized or deactivated vial. Check for adsorption to the glass wall.
- Evaporation over a long run: weigh a sealed vial before and after 8 hours. If it loses more than 1 percent, switch from a pre-slit to a solid septum or use a cap with a bonded seal.
- Particulates in the vial: check for coring, check the filter or centrifuge step, and inspect the vial under a light before injection.
Recommendation: what to standardize on
For most HPLC and GC labs running 2 mL autosampler formats, I recommend standardizing on 12 x 32 mm, 9 mm neck, USP Type I clear borosilicate vials with 9 mm crimp caps and 1.0 mm silicone/PTFE septa for methods that inject 3 to 5 times per vial, and 9 mm screw caps with pre-slit septa for methods that inject more than 10 times per vial. Use amber glass for light-sensitive analytes and silanized vials for proteins and peptides.
For headspace, standardize on 20 mL crimp vials with 20 mm caps and verify the septum temperature rating against your oven program. For micro-volume work, use 300 µL vials or 2 mL vials with 150 µL inserts. Set a crimper torque and verify it every shift, and set a screw-cap torque of 0.5 to 1.0 N·m with a calibrated driver. Buy on cost per injection, not cost per thousand, and ask for the dimensional certificate with every lot.
The vial is a small part of the analytical chain, but it is the part that touches every sample. Get the neck finish, the septum, and the dimensional tolerance right, and the rest of the method has a chance to work.
References & further reading
Related resources from our lab consumables network:
- Sample Vial at samplevialprice.com
- Chromatography Products at chromatographyselling.com
- Aijiren at aijirentech.com
- Vials With Caps at vialswithcaps.com
External references and standards: