
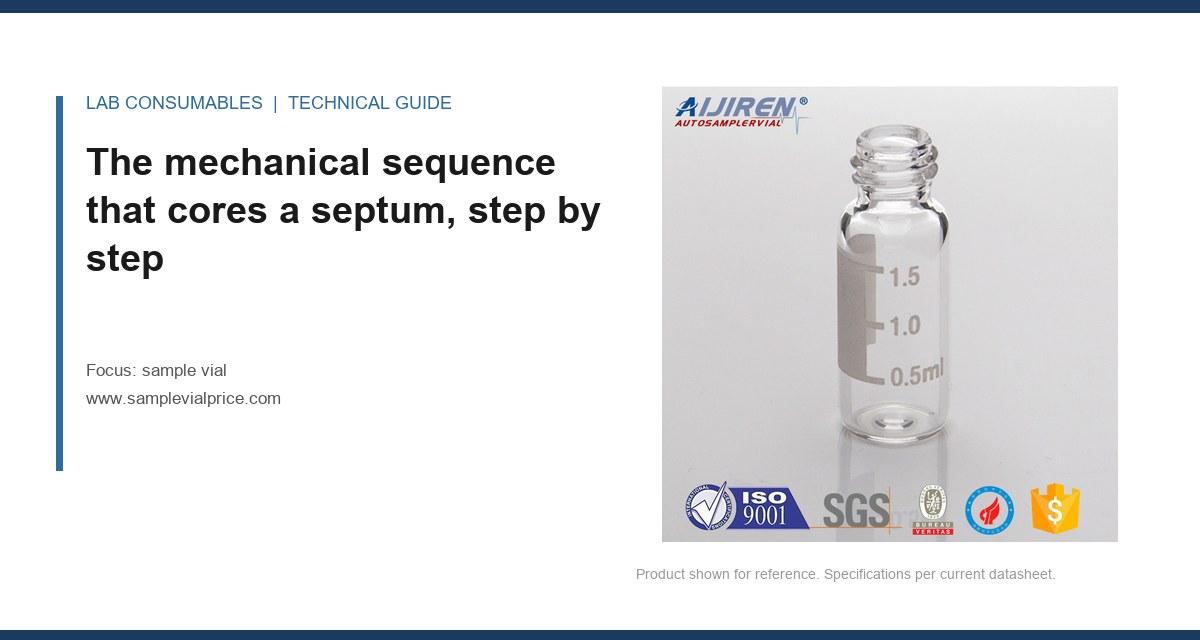
A 96-vial overnight GC-MS sequence died at vial 47. The autosampler needle had grabbed a 0.9 mm plug of silicone out of the septum and carried it into the inlet. Every injection after that showed ghost peaks, and the needle tip was bent 6 degrees off axis. That is sample vial coring, fragments and needle damage diagnosis in one failure: the vial did not just leak, it fed solid material into the analytical path. Most labs replace the septum and move on. The ones that keep having the problem have never measured the needle bevel, the septum hardness, or the guide clearance that actually punches the plug.
Coring is not random. It happens when a needle tip acts like a hole punch instead of a lance. A standard 23-gauge autosampler needle with a 12-degree bevel cuts a crescent-shaped slit when it enters a septum. If the septum material is soft enough, that slit closes after withdrawal. If the material is hard, over-compressed, or already pierced too many times, the bevel shears a full circle instead of a crescent. That circle is the plug you find in the inlet liner or stuck to the needle tip.
The sequence is fast but repeatable. The needle descends. The bevel tip contacts the septum surface. If the needle guide or the vial cap is off-center by more than 0.15 mm, the tip hits at an angle and the bevel edge catches instead of slicing. The needle then pushes through, and the trailing edge of the bevel drags a disc of material with it. On withdrawal, the disc either stays in the septum hole, falls into the vial, or rides up the needle shaft. I have pulled plugs off a needle with tweezers that measured 0.8 mm across, exactly the needle OD, with a clean shear edge on one side. That shear edge is the signature of a punch cut, not a tear.
What the debris tells you before you blame the septum
Put the debris under a 10x loupe before you order a new septum lot. A plug that is a perfect disc with one flat side and one curved side was cut by the bevel heel. A plug that is ragged and tapered was torn during withdrawal, which points to septum hardness or cap torque. Fragments that are white and crumbly are usually PTFE facing. Fragments that are translucent and rubbery are silicone. If you find silicone without PTFE facing, the needle has already punched through the barrier layer and is reaming the core. That means the PTFE layer was compromised, whether by a burr on the needle or by using a vial cap that does not keep the septum flat.
Measure the debris. A plug diameter equal to the needle OD tells you the needle is the punch. A plug diameter smaller than the needle OD, say 0.5 mm on a 0.7 mm needle, means the septum material is compressing around the needle and being extruded, which is a hardness problem. A plug with a curved tail means the needle was withdrawn at an angle, and the tail points to the side where the guide clearance is widest. I keep a set of gauge pins on the bench for this. It takes two minutes and it changes the diagnosis.
Needle geometry that turns a pierce into a punch
Not all needles core. A standard point style 2 or point style 3 needle with a 12-degree bevel will pierce a 55 Shore A septum for hundreds of cycles without coring if the guide is centered and the cap torque is correct. Change one variable and the punch starts. A needle with a burr on the bevel heel, even a 10-micron burr from a collision with a vial insert, will grab material on every stroke. A needle with a bent tip, even 3 degrees off axis, will contact the septum at an angle and shear instead of slice.
The needle OD matters more than most people admit. A 23-gauge needle (0.64 mm OD) with a 12-degree bevel has a cutting edge that is about 1.2 mm long. A 26-gauge needle (0.46 mm OD) has a shorter bevel and is less likely to core a hard septum, but it clogs faster if you are injecting dirty samples. If you run 2 mL vials with 9 mm screw caps, the standard needle is 51 mm long with a 0.64 mm OD. If you run 12 x 32 mm vials with 11 mm crimp caps, the needle is shorter and the guide is tighter. The coring problem almost always shows up on the 9 mm screw cap format because the cap has more lateral play.
Check the needle guide. The guide is the plastic or metal sleeve the needle passes through before it hits the septum. If the guide ID is more than 0.2 mm larger than the needle OD, the needle can wander. At 0.2 mm of play, a 51 mm needle tip can land 0.4 mm off center on the septum. That off-center contact is enough to start a punch cut on a 55 Shore A silicone septum. I have measured guide ID on autosamplers that had been in service for five years and found wear of 0.3 mm. The lab was changing septa every 40 injections and still seeing fragments in the liner. The fix was a new guide, not a new septum.
Septum hardness and cap torque: the two numbers you can set
Septum hardness is measured in Shore A. A 45 Shore A septum is soft and forgiving but extrudes under repeated piercing. A 55 Shore A septum is the workhorse for HPLC and GC. A 60 Shore A or harder septum seals well but cores easily if the needle is not perfect. For a 23-gauge needle, I stay at 50 to 55 Shore A. For a 26-gauge needle, I go up to 55 to 60 Shore A because the smaller needle needs more material stiffness to seal. If your coring problem started when you switched to a cheaper septum lot, check the Shore A. Vendors do not always print it on the bag, but a durometer reads it in seconds.
Cap torque is the other variable. A 9 mm screw cap with a PTFE/silicone septum should be tightened to 0.15 to 0.20 N·m, which is 1.3 to 1.8 inch-pounds. Above 0.25 N·m, the septum compresses and bulges toward the needle. That bulge reduces the effective needle travel and increases the contact angle. Below 0.10 N·m, the septum moves during piercing and the needle can tear instead of slice. I use a torque wrench on every new cap lot. Hand-tightening varies from 0.08 to 0.35 N·m across four technicians. That spread alone explains why one shift sees coring and the next does not.
Reading the failure pattern across a tray of 100 vials
Do not diagnose from one vial. Look at the pattern across the tray. If every vial in a row shows fragments, the needle or guide is the problem. If only vials 1 through 20 show fragments and vials 21 through 100 are clean, the septum lot changed or the cap torque was set wrong on the first rack. If the fragments appear only in vials with inserts, the insert is off-center and the needle is hitting the insert wall before it hits the septum. That collision dulls the bevel and turns the next pierce into a punch.
Measure the failure rate per 100 injections. A good 55 Shore A septum with a centered guide and correct torque should run 100 injections without visible fragments. If you see fragments at 40 injections, you have a geometry problem, not a material problem. If you see fragments at 80 injections, the septum is reaching the end of its puncture life. The Agilent chromatography consumables and columns documentation lists puncture life for their septa under specific needle conditions. Compare your numbers to that baseline.
Two field cases: the measurements that found the cause
Case one: a contract lab running 1,200 injections per day on two GC-MS systems. They were seeing silicone fragments in the inlet liner on both systems every morning. The fragments were perfect discs, 0.64 mm diameter, with clean shear edges. I measured the needle guide ID on both autosamplers. System one was 0.71 mm, within spec. System two was 0.79 mm, worn 0.08 mm beyond the 0.71 mm original. System two was producing 80 percent of the fragments. The fix was a replacement guide assembly, not a septum change. After replacement, fragment count dropped from 12 per day to zero for three weeks.
Case two: a pharma QC lab running a 10-minute HPLC method with 2 mL vials and 9 mm screw caps. They saw PTFE fragments floating in the sample vials after injection. The fragments were white, irregular, and 0.3 to 0.5 mm across. I measured cap torque on 20 vials from their line. The average was 0.28 N·m, with a high of 0.34 N·m. The septum was a 55 Shore A PTFE/silicone. At that torque, the PTFE facing was cracking under the needle and shedding fragments into the vial. We set the torque wrench to 0.18 N·m and retrained the line. Fragment count dropped to zero in the next 200 vials. The septum lot was fine. The torque was not.
Decision table: matching needle, septum, and torque to stop coring
| Parameter | Safe range | When coring starts | Measurement tool |
|---|---|---|---|
| Needle bevel angle | 12 to 15 degrees | Below 10 degrees or above 20 degrees | Optical comparator or loupe |
| Needle guide ID clearance | 0.05 to 0.15 mm over needle OD | Above 0.20 mm | Gauge pins |
| Septum Shore A hardness | 50 to 55 for 23-gauge | 60 or above with worn needle | Durometer |
| Cap torque (9 mm screw) | 0.15 to 0.20 N·m | Above 0.25 N·m | Torque wrench |
| Puncture count per septum | 100 max for 55 Shore A | 150 or above | Injection log |
| Needle tip runout | 0.05 mm or less | Above 0.10 mm | Dial indicator |
The numbers in this table come from measuring failures on real instruments, not from a catalog. If your setup is outside the safe range on any row, you have a coring source. Fix that row before you change the septum supplier.
Operational precautions that prevent the punch cut
Inspect the needle bevel under a 10x loupe at the start of every shift. Look for a burr on the heel, a flat spot on the tip, or a bend. A burr you can feel with a fingernail is enough to core a 55 Shore A septum on the next injection. Replace the needle if the bevel is not clean. Do not try to file it. A filed needle has a new edge geometry that is worse than the burr.
Set cap torque with a calibrated torque wrench, not by hand. The acceptable range for 9 mm screw caps is 0.15 to 0.20 N·m. For 11 mm crimp caps, the crimp force should be set so the septum is flat and the cap does not rotate under finger pressure. A crimped cap that is too tight compresses the septum and creates the same bulge that coring needs. A crimped cap that is too loose lets the needle push the septum into the vial.
Track puncture count per septum. A 55 Shore A PTFE/silicone septum with a 23-gauge needle is good for about 100 injections. After that, the self-healing property degrades and the next pierce may core. If your method uses multiple injections from the same vial, count them. A 50-injection method with two injections per vial means the septum sees 100 punctures by vial 50. That is the end of life. If you need more punctures, switch to a pre-slit septum. A pre-slit septum with a blunt needle can run 200 or more injections, but the slit must be centered and the needle must be blunt, not beveled. Using a beveled needle in a pre-slit septum defeats the purpose and can core the slit edges.
Why the vial body and cap geometry matter more than the septum brand
The septum does not core itself. The vial body, cap, and autosampler guide create the conditions. A vial with a neck ID that is off by 0.1 mm forces the cap to sit off-center. An off-center cap puts the septum off-center under the needle. The needle then hits the septum at an angle and the bevel catches. I have measured vials from three suppliers where the neck ID varied by 0.2 mm. The cheapest vial had the widest variation, and it was the one causing the coring. The fix was not a better septum. It was a sample vial with a neck ID that matched the autosampler guide within 0.05 mm.
Cap material also matters. A polypropylene cap is more rigid than a polyethylene cap. That rigidity keeps the septum flatter under torque. A cap that flexes under torque allows the septum to dome, and a domed septum is a coring target. If you are using a cap with a center hole that is too large, the septum can bulge through the hole and the needle will hit a curved surface. The hole in a 9 mm screw cap should be 2.5 to 3.0 mm in diameter. Above 3.5 mm, the septum support is inadequate. Check the hole diameter on a new cap lot before you commit to it.
For HPLC and GC method development, the Thermo Fisher chromatography and sample handling line includes vials and septa with published puncture and hardness specs. When I am setting up a method that will run 500 injections per day, I start with those published numbers and then verify on my own instrument. A published spec is a starting point, not a guarantee.
When the problem is the method, not the hardware
Some coring problems are method-driven. If you inject a sample that is saturated with a solvent that swells silicone, the septum softens during the run and the next injection cores it. Dichloromethane and tetrahydrofuran swell silicone. A septum that is rated for aqueous samples may fail in 20 injections with DCM. The fix is a septum with a different core material, such as PTFE-faced silicone with a fluoropolymer barrier, or a butyl rubber core for chlorinated solvents. Check the chemical compatibility table before you blame the needle.
Sample pH also matters. A sample at pH 1 or pH 13 attacks the silicone core through the PTFE facing if the facing is cracked. A cracked facing is invisible to the naked eye but obvious under a loupe. If you see PTFE fragments in the vial and the method uses aggressive pH, the facing is failing and the needle is then punching silicone. The fix is a thicker PTFE facing, typically 0.25 mm instead of 0.10 mm, or a different facing material. The U.S. EPA SW-846 test methods for waste and materials include methods with aggressive digestion matrices that are hard on septa. If you run those methods, expect shorter septum life and plan for it.
Troubleshooting checklist: from symptom to fix in 30 minutes
- Find a fragment. Put it under a 10x loupe. Disc or ragged? PTFE or silicone? Measure the diameter.
- Check the needle. Bevel angle, burr on heel, tip bend. Replace if any defect is visible.
- Measure guide clearance. Gauge pin the guide ID against the needle OD. Above 0.20 mm clearance is a coring source.
- Check cap torque. Use a torque wrench on 10 caps. Above 0.25 N·m or below 0.10 N·m is a problem.
- Check septum hardness. Durometer the septum. Above 60 Shore A with a 23-gauge needle will core.
- Count punctures. How many injections has this septum seen? Above 100 for 55 Shore A is end of life.
- Look at the pattern. One vial or all vials? One rack or the whole tray? Pattern points to needle, guide, or lot.
- Check the solvent. DCM, THF, or aggressive pH? Switch to a chemically compatible septum.
Run this checklist in order. The first three steps find 90 percent of coring causes. The last three catch the method-driven cases that hardware fixes will not solve.
Selecting a vial and septum set that does not core
Start with the needle you have. If your autosampler uses a 23-gauge beveled needle, order a 55 Shore A PTFE/silicone septum with a 0.10 mm PTFE facing. Set cap torque to 0.18 N·m. If you run more than 100 injections per vial, switch to a pre-slit septum and a blunt needle. If you run chlorinated solvents, order a septum with a fluoropolymer barrier. If your guide clearance is above 0.20 mm, replace the guide before you order anything else.
For the vial body, check the neck ID against the autosampler guide. A neck ID that is within 0.05 mm of the guide ID keeps the septum centered. A neck ID that varies by 0.2 mm across the lot will cause intermittent coring that no septum change fixes. The vials with caps category on our site lists neck ID and cap hole diameter for each format. Match those numbers to your autosampler, not to the previous purchase order.
If you are validating a method for a regulated environment, document the septum lot, the Shore A hardness, the cap torque setting, and the puncture count limit. When the method transfers to another lab, those numbers are what keep the coring problem from following the method. I have seen a method transfer fail because the receiving lab used a softer septum and a hand-tightened cap. The method was fine. The hardware choices were not. For method development support, the Restek technical resources for chromatography include application notes on septum selection and autosampler maintenance. Use them as a reference, then verify on your own instrument.
For labs that run high-volume screening, the economics are simple. A septum that costs 10 cents more per unit but runs 100 injections without coring is cheaper than a septum that costs 5 cents and cores at 40 injections. The cost of a failed sequence, a bent needle, and a contaminated inlet is 50 to 200 times the septum price difference. Buy the septum that matches your needle and method, not the one that matches the old purchase order. The chromatography products line includes septa with published hardness and puncture specs. Compare those specs across suppliers before you switch.
For custom vial and septum configurations, Aijiren manufactures vials with specified neck ID, cap hole diameter, and septum hardness. When I need a non-standard combination, I specify the Shore A, the PTFE facing thickness, and the cap torque range on the drawing. That removes the guesswork from the next lot.
The decision rule is this: if the debris is a clean disc the diameter of the needle, the needle or guide is the cause. If the debris is ragged or smaller than the needle, the septum hardness or cap torque is the cause. Measure the debris, check the needle, measure the guide clearance, set the torque, and count the punctures. Do those five things before you change the septum supplier. The septum is usually the victim, not the culprit.
References & further reading
Related resources from our lab consumables network:
- Sample Vial at samplevialprice.com
- Chromatography Products at chromatographyselling.com
- Aijiren at aijirentech.com
- Vials With Caps at vialswithcaps.com
External references and standards: