
The run was 48,000 2 mL HPLC vials, clear Type I borosilicate, 9 mm screw thread. Cap torque spec was 18 cN·m. Final inspection caught 340 vials with septum crimp marks at the 12 o’clock position. The line supervisor called a stop. The fault was not the capper. It was a worn guide rail at the capping station, replaced 14 weeks earlier, now running 0.3 mm out of true. That is what a sample vial factory actually controls on the line: not just the product, but the tooling drift that quietly ruins it. This article maps the line station by station, separating what is closed-loop controlled from what is only checked at the end.
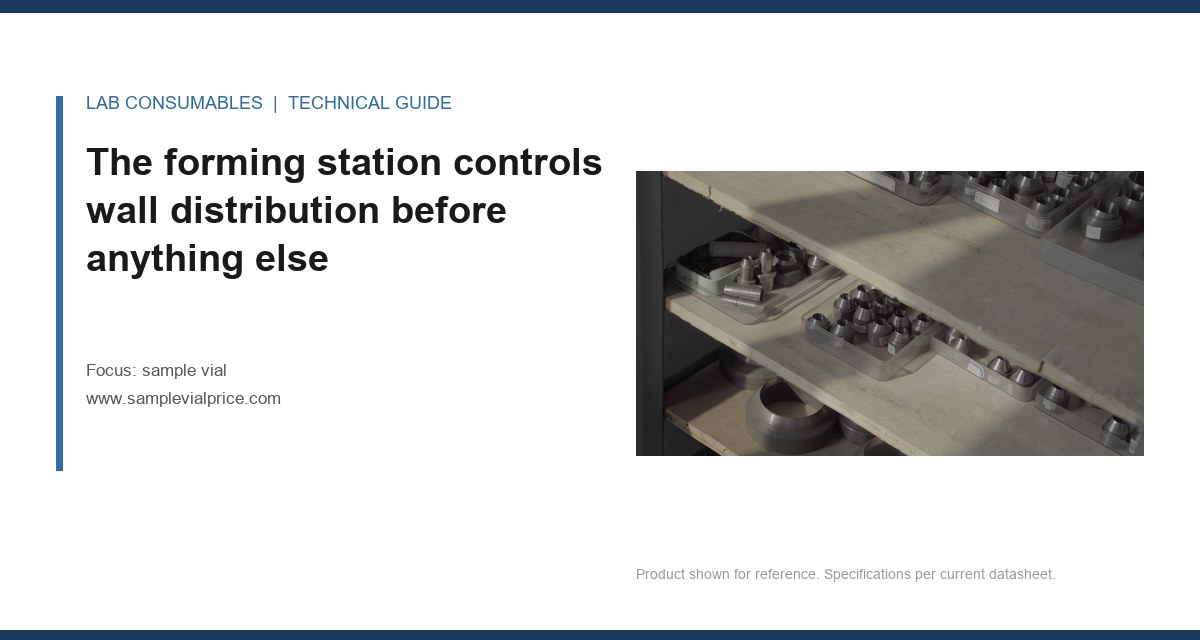
Most sample vials start as borosilicate glass tubing, either 33 expansion or 51 expansion depending on the application. The forming station does not melt raw batch. It reheats precision-drawn tube and shapes the bottom, the neck, and the thread area. The parameter that matters most here is wall distribution. A vial with a 1.1 mm wall on one side and 0.8 mm on the other will pass a visual check and still fail under autosampler needle impact or thermal cycling.
On a modern forming line, the operator sets the burner temperature, the indexing speed, and the forming mandrel pressure. Burner temperature for 33 expansion tubing typically runs between 1,180 °C and 1,240 °C. Indexing speed for a 2 mL vial is usually 42 to 55 pieces per minute depending on the machine. The mandrel pressure controls how hard the glass is pushed into the bottom mold. These three are closed-loop on better lines: thermocouples feed back to the gas mixer, an encoder tracks index speed, and a pressure transducer watches the mandrel circuit. Wall distribution itself is not closed-loop. It is checked at the end of the forming section by a laser gauge that measures wall thickness at four points around the circumference. If the gauge flags a drift beyond ±0.08 mm, the operator adjusts the burner or mandrel manually.
What the factory cannot fix at this station: cord lines, air lines, and stones in the glass. Those come from the tubing supplier. A good vial factory sorts incoming tubing by lot and runs a sample through the forming line before committing to a full production run. I have rejected tubing lots where the stone count exceeded 3 per 100 kg. That number is not in any ISO spec for vials. It is an internal threshold that separates a supplier who cares about autosampler needle life from one who does not.
Annealing is the station most buyers never ask about
After forming, vials pass through an annealing lehr. The lehr brings the glass back down from forming temperature through the strain point slowly enough to release internal stress. For borosilicate, the annealing point is around 560 °C and the strain point around 510 °C. The lehr profile matters because a vial that leaves the line with residual stress will crack when it meets a hot wash cycle, a cold autosampler tray, or a -80 °C freezer.
The factory controls belt speed and zone temperatures. A typical lehr for 2 mL vials has four zones: 560 °C, 520 °C, 400 °C, and ambient. Belt speed is set so the vial spends at least 18 to 22 minutes in the lehr. These are closed-loop on any line built after about 2005. The problem is that closed-loop control of zone temperature does not guarantee low residual stress. The vial must actually sit in the zone long enough. If a factory pushes belt speed to hit output targets, the zone temperatures look right on the recorder and the vials still come out stressed.
The check that catches this is a polariscope inspection. A stressed vial shows a bright cross or colored bands when viewed under polarized light. The factory checks a sample at the lehr exit, not every vial. The standard I have seen on the better lines is one polariscope check per 2,000 vials, with a pass criterion of no visible strain beyond the neck ring. If a buyer wants to verify this, ask for the lehr chart recorder data for the production lot. Most factories will provide it. Most buyers never ask.
The thread forming station sets the torque window you will feel later
Screw thread vials get their thread profile at the forming station or at a separate thread-forming station, depending on the line design. The thread is not machined. It is pressed into the still-soft glass by a rotating thread form. The critical dimensions are the thread outer diameter, the thread pitch, and the thread start position. For a standard 9 mm short thread, the outer diameter is 8.7 mm to 9.0 mm and the pitch is 2.5 mm per turn. For an 8-425 thread, the outer diameter is 8.0 mm to 8.2 mm.
What the factory controls here is the temperature of the glass as it enters the thread former and the dwell time of the thread form against the glass. If the glass is too hot, the thread form pulls material and the thread becomes shallow. If it is too cold, the thread form cracks the neck. The closed-loop part is the glass temperature, measured with an infrared pyrometer and fed back to the burner. The dwell time is set mechanically and checked by the thread profile gauge at the end of the station.
The parameter that causes the most field failures is thread start position. If the thread start varies by more than 0.5 mm around the circumference, the cap will cross-thread on some vials. The operator checks thread start with a go/no-go fixture every 500 vials. This is not a closed-loop control. It is an end-of-station check. A factory that skips it ships vials that work fine until a lab tech tightens a cap by hand and strips the thread on every tenth vial.
Surface treatment is where silanization and low-adsorption claims live or die
Not every sample vial gets surface treatment. But for those that do, this station is the difference between a vial that holds a 10 ppb pesticide standard and one that adsorbs half of it onto the glass wall. The two main treatments are silanization (deactivation) and low-adsorption polymer coating. Silanization replaces surface silanol groups with a non-polar organic layer. The coating is usually applied by vapor deposition in a vacuum chamber or by dip coating followed by a controlled cure.
The factory controls three things at this station: the silane concentration, the exposure time, and the cure temperature. For vapor-phase silanization, the silane is typically 1% to 5% dimethyldichlorosilane in a carrier gas, with exposure time of 10 to 30 minutes and cure at 110 °C to 130 °C. For dip coating, the solution concentration is lower and the cure is longer. These are closed-loop on lines that do serious volume. The silane concentration is monitored by gas chromatography, the exposure time by the line index, and the cure temperature by oven thermocouples.
What is not closed-loop is the uniformity of the coating. A dip-coated vial can have a thicker layer at the bottom where the liquid pools during draining. A vapor-coated vial can have a thinner layer near the neck where gas flow is turbulent. The factory checks coating uniformity by measuring the contact angle of a water droplet on the vial wall. A good silanized surface shows a contact angle of 95° to 110°. An untreated borosilicate surface shows 20° to 40°. The check is done on a sample, not on every vial. The sample size I have seen specified is 5 vials per 10,000.
If you are buying low-adsorption vials for U.S. EPA SW-846 test methods, ask the factory for the contact angle data and the silane lot number. If they cannot produce both, the low-adsorption claim is marketing. The vial will still hold liquid. It will not hold your analyte.
The septum insertion station controls puncture count, not just fit
Septum insertion looks simple. A pre-cut septum is pressed into a cap, then the cap is threaded onto the vial. The station actually controls two things that determine how many times an autosampler needle can pierce that septum before it leaks or cores. The first is the septum compression force during insertion. The second is the cap torque applied when the cap is seated.
Compression force matters because a PTFE/silicone septum that is over-compressed during insertion will delaminate. The PTFE layer separates from the silicone layer, and the first needle strike pushes a flap of PTFE into the vial. The factory sets the insertion punch pressure to match the septum thickness and durometer. For a 1.5 mm thick PTFE/silicone septum with a 55 Shore A silicone core, the insertion force is typically 120 to 180 N. For a 1.0 mm septum with a 40 Shore A core, it is 60 to 100 N. The force is set by a load cell on the insertion head and checked every 1,000 vials.
Cap torque is the parameter that generates the most service calls. A cap torqued too loose leaks during transport. A cap torqued too tight crushes the septum and reduces the puncture count. The standard torque for a 9 mm screw cap on a 2 mL vial is 14 to 20 cN·m. For an 8-425 cap, it is 10 to 16 cN·m. The capping station uses a torque-controlled chuck, and the torque is verified with a calibrated torque tester at the end of the line. The verification frequency I recommend is one cap per 500 vials.
The puncture count itself is not measured on every lot. It is a type test, done on a sample of capped vials using a test needle that matches the autosampler needle gauge. A good PTFE/silicone septum should survive 50 to 100 piercings before leaking. A silicone-only septum should survive 10 to 25. If a factory cannot state the puncture count for their septum, they have not done the type test. That means they do not know what they are selling.
Washing and drying is the station that separates clean from “looks clean”
Sample vials are washed before packaging, but the wash process is not the same across factories. The difference is in the water quality, the rinse sequence, and the drying method. A vial that is washed in deionized water with a final resistivity of 18.2 MΩ·cm is not the same as one washed in municipal water that has been softened. The residue left by the latter will show up as ghost peaks in a GC-MS run.
The factory controls the wash water resistivity, the rinse time, and the oven temperature. The wash water is monitored continuously with a resistivity meter. The rinse sequence is typically three rinses: tap water, deionized water, and 18.2 MΩ·cm water, with a final rinse time of 20 to 30 seconds per vial. The drying oven runs at 110 °C to 150 °C depending on the line speed. These are closed-loop on any line that is serious about cleanliness.
What is not closed-loop is the particulate level in the wash water. The resistivity meter tells you the water is ionically clean. It does not tell you the water has no particles. A 0.5 µm particle will not affect resistivity but will show up in a light obscuration test. The factory checks the wash water with a particle counter at the start of each shift. The pass criterion I have used is fewer than 10 particles per mL at ≥ 0.5 µm. If a buyer wants to verify cleanliness, ask for the particle count data, not just the resistivity data.
For vials used with Thermo Fisher chromatography and sample handling systems, the cleanliness requirement is tighter. An autosampler needle that picks up a particle from a vial wall can carry it into the injection port and score the rotor seal. The cost of that repair is more than the cost of a year’s supply of properly washed vials.
Packaging is a control point, not a formality
The packaging station is where many factories lose the quality they built upstream. A vial that leaves the annealing lehr with low stress and leaves the wash station with low residue can still arrive at the lab with a cracked neck or a contaminated septum if the packaging is wrong. The factory controls the tray material, the tray stack height, and the shrink wrap tension.
Tray material matters because some plastics outgas plasticizers that adsorb onto the vial surface. Polystyrene trays are cheaper but outgas more than polypropylene trays. For trace analysis, the tray should be polypropylene or PET, not polystyrene. The stack height matters because a stack of 20 trays puts more load on the bottom tray than a stack of 10. The bottom vials in a 20-tray stack see a compressive load that can crack the neck if the thread area has any residual stress. The factory sets the stack height based on the tray design and the vial strength. For a 2 mL vial in a standard 100-position polypropylene tray, the maximum stack height I recommend is 12 trays.
Shrink wrap tension is the parameter that causes the most hidden damage. If the wrap is too tight, it distorts the tray and puts a bending load on the vial necks. If it is too loose, the trays shift during shipping and the vials rub against each other. The factory sets the shrink tunnel temperature and the film tension. The tunnel temperature is typically 160 °C to 180 °C for polyethylene film. The tension is set so the film conforms to the tray without pulling the corners inward. This is checked by visual inspection at the end of the line, not by closed-loop control.
A field case that fits this station: a lab in Singapore received 20,000 vials with a 4% breakage rate on arrival. The vials were fine leaving the factory. The breakage was traced to a shrink wrap tension increase made by a new packaging operator. The film was pulling the top tray corners inward by 2 mm, which was enough to crack the neck on vials in the corner positions. The fix was a tension gauge on the shrink wrapper and a go/no-go check on tray corner deflection. That check takes 30 seconds per pallet. The factory that skips it pays for the replacement vials and the lost customer trust.
Closed-loop controls vs. end-of-line checks: what the factory can and cannot adjust in real time
The distinction between closed-loop control and end-of-line check is the most useful thing a buyer can understand about a vial factory. A closed-loop control adjusts a parameter continuously based on a sensor reading. An end-of-line check measures the product after the fact and tells you whether to ship it or scrap it. The table below maps the main parameters.
| Parameter | Control type | Sensor or check | Typical setpoint or limit |
|---|---|---|---|
| Glass temperature at forming | Closed-loop | Thermocouple or pyrometer | 1,180 °C to 1,240 °C |
| Indexing speed | Closed-loop | Encoder | 42 to 55 vials/min |
| Wall thickness distribution | End-of-line check | Laser gauge, 4 points | ±0.08 mm |
| Lehr zone temperature | Closed-loop | Thermocouple | 560 °C / 520 °C / 400 °C |
| Residual stress | End-of-line check | Polariscope | No visible strain beyond neck ring |
| Thread outer diameter | End-of-line check | Go/no-go gauge | 8.7 mm to 9.0 mm (9 mm thread) |
| Silane concentration | Closed-loop | Gas chromatograph | 1% to 5% in carrier gas |
| Coating uniformity | End-of-line check | Contact angle | 95° to 110° |
| Septum insertion force | Closed-loop | Load cell | 120 to 180 N (1.5 mm septum) |
| Cap torque | Closed-loop | Torque-controlled chuck | 14 to 20 cN·m (9 mm cap) |
| Wash water resistivity | Closed-loop | Resistivity meter | 18.2 MΩ·cm |
| Wash water particulates | End-of-line check | Particle counter | <10 particles/mL ≥ 0.5 µm |
| Shrink wrap tension | End-of-line check | Visual or tension gauge | No tray corner deflection >2 mm |
The pattern is clear. The factory can control temperature, speed, force, and torque in real time. It cannot control wall distribution, residual stress, coating uniformity, or particulate level in real time. Those are checked after the fact. A buyer who understands this distinction asks different questions. Instead of asking “do you control quality,” they ask “which parameters are closed-loop on your line, and what is your check frequency for the rest.”
A station-by-station troubleshooting checklist for incoming vial lots
When a vial lot fails in the lab, the symptom points to a station. The checklist below maps the failure to the station and the measurement that confirms it. This is the checklist I use when a customer reports a problem with a lot.
- Symptom: vials crack during capping or in the autosampler tray. Likely station: annealing or thread forming. Confirm with a polariscope check for residual stress. If stress is present, the lehr was too fast or the thread former was too cold.
- Symptom: caps cross-thread or strip. Likely station: thread forming. Confirm by measuring thread outer diameter and thread start position on 20 vials. If the start position varies by more than 0.5 mm, the thread form is worn.
- Symptom: analyte recovery drops after switching vial lots. Likely station: surface treatment or washing. Confirm by running a contact angle check on the new lot. If the angle is below 90°, the silanization is incomplete or the wash left a residue.
- Symptom: septum cores on first injection. Likely station: septum insertion. Confirm by measuring the insertion force on a sample of caps. If the force is above 180 N for a 1.5 mm septum, the insertion punch is over-compressing the septum.
- Symptom: vials arrive with cracked necks or broken trays. Likely station: packaging. Confirm by checking tray corner deflection on the shrink-wrapped pallet. If the deflection is more than 2 mm, the shrink wrap tension is too high.
- Symptom: ghost peaks in GC-MS runs. Likely station: washing or packaging. Confirm by running a blank with a clean vial from a different lot. If the ghost peaks disappear, the lot has a residue from wash water or tray outgassing.
Each of these failures has a specific measurement that identifies it. The factory that owns the measurement can fix the problem. The factory that does not own it will argue with you about whether the problem exists.
What to ask the factory before you place the next order
Most buyers ask for a certificate of analysis and a price. The COA tells you the lot passed the factory’s own checks. It does not tell you what those checks were or how often they were done. The questions below get at the control system behind the COA. Ask them in this order.
- What is your closed-loop parameter list for the forming and annealing stations? If they cannot answer, they are running a manual line with no real-time control.
- What is your check frequency for wall thickness, residual stress, and thread profile? If the frequency is less than one check per 1,000 vials, the lot is not under statistical control.
- What is your cap torque verification frequency and what is the torque window? If the window is wider than 14 to 20 cN·m for a 9 mm cap, the capping station is not tuned.
- What is your septum puncture count type test result for the septum you are quoting? If they cannot state a number, they have not run the test.
- What is your wash water resistivity and particulate count for the lot? If they only give resistivity, they are not measuring particles.
- Can you provide the lehr chart recorder data and the contact angle data for the lot? If they hesitate, the data does not exist or does not support their claims.
These questions take five minutes to ask and save weeks of troubleshooting later. The factories that answer them well are the ones that understand their own line. The Sample Vial category on our site lists suppliers who have answered these questions in writing. The ones who have not are not listed. For a broader view of what else sits on the bench next to the vial, Chromatography Products covers the consumables that share the autosampler tray. If you are sourcing vials with integrated caps, Vials With Caps goes into the cap and septum side in more detail. And if you want to see a factory that publishes its control parameters online, Aijiren is one of the few that does.
For the analytical context that drives vial selection, Agilent chromatography consumables and columns documents the autosampler interface dimensions that the vial must match. Restek technical resources for chromatography publishes application notes that show what happens when a vial surface is not inert. Both are worth reading before you commit to a vial lot.
The decision rule is simple. Buy sample vials from a factory that can tell you which parameters are closed-loop controlled, what the check frequency is for the rest, and what the type test results are for the septum. If they cannot answer those three questions, the price does not matter. The vial that fails in the autosampler costs more than the one that never should have shipped.
References & further reading
Related resources from our lab consumables network:
- Sample Vial at samplevialprice.com
- Chromatography Products at chromatographyselling.com
- Aijiren at aijirentech.com
- Vials With Caps at vialswithcaps.com
External references and standards: