
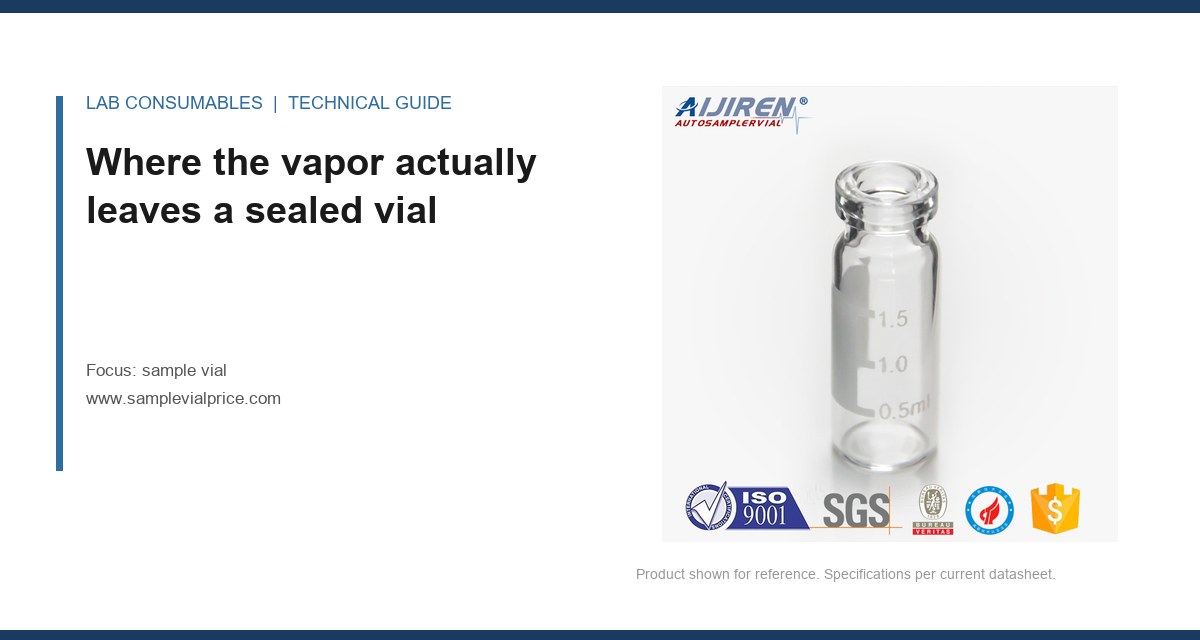
A 96-well plate run on a Monday morning came back with three wells at 71% recovery against a 98% calibration curve. The samples had sat in 2 mL crimp vials over a 62-hour weekend hold at 8 °C. We weighed the vials before and after the hold: an average loss of 4.1 mg per vial, with the worst at 9.8 mg. That is roughly 4 µL of solvent gone from a 1.5 mL fill, and for a volatile analyte at the front of the peak, 4 µL of headspace enrichment is enough to move the result. The instrument was fine. The column was new. The sample vial seal failure was the whole story, and it had been happening quietly for months because nobody weighed anything.
Evaporation loss is the failure mode that does not announce itself. It does not throw an error, it does not spike the pressure, and it does not show up in a system suitability check unless you happen to run one at the end of the hold. It shows up as drift, as a recovery number that is 2 to 6% low, as an internal standard ratio that creeps. This article is about where the vapor actually escapes, why a septum that seals perfectly on the first puncture can leak on the fourth, how compression set quietly kills a cap over a run, and how to measure the loss gravimetrically so you stop guessing. If you buy sample vial lots on price alone, this is the article you need before the next audit.
There are four leak paths on a standard 12 x 32 mm crimp or screw vial, and they are not equally likely. I rank them by the frequency I have seen them in field investigations over fifteen years.
Path 1: the septum-to-cap compression interface
On a crimp vial, the septum is held against the glass land by the aluminum seal. If the crimp is loose, the septum is not compressed and vapor passes around its edge, not through it. A correct crimp on a 11 mm seal pulls the skirt down so the septum is compressed roughly 30 to 40% of its thickness. An 11 mm septum at 1.0 mm nominal thickness should sit at about 0.65 mm under a good crimp. If you can rotate the cap by hand with light finger pressure, the crimp is loose and it will leak. This is the single most common cause of loss I find on manual crimpers that have not been adjusted since they were unboxed.
Path 2: the glass land and the neck finish
The sealing land on a 12 x 32 mm vial is a narrow annular surface at the top of the neck. A chip, a mold seam that runs across the land, or a land that is not square to the axis will leak no matter how good the cap is. Under 10x magnification a proper land is continuous and flat. A defective one shows a bright interruption where light passes under a straightedge. Neck finish dimensions follow the GPI thread standard for screw vials (13-425, 15-425, 18-400 are the common ones), and a cap that is one thread class off will bottom out before it compresses the septum.
Path 3: through the septum itself
Silicone and silicone/PTFE septa are permeable to many solvents at a low but nonzero rate, and that rate climbs with temperature. A 1.0 mm silicone septum at 25 °C passes very little, but hold the same vial at 40 °C in an autosampler tray for 48 hours and the diffusional loss becomes measurable. PTFE-faced septa cut the through-material rate substantially because the PTFE film is the barrier. The trade is that PTFE does not re-seal as well after puncture, which is the next section.
Path 4: the puncture hole
Every needle insertion leaves a channel. A 22-gauge needle (0.72 mm OD) through a 1.0 mm silicone septum leaves a hole that closes by elastic recovery, not by magic. Recovery depends on the elastomer, the septum thickness, the needle bevel, and how long the needle dwells. A sharp bevel and a short dwell recover better. A blunt or burred needle tears rather than parts the material and the hole stays open. This is where re-seal behaviour becomes the deciding variable.
Re-seal after puncture: what the septum does on the second and fifth injection
The first puncture is not the problem. The fifth is. A septum that re-seals to 95% on injection one may re-seal to 80% by injection five, and the loss compounds over a multi-injection sequence. I have measured this directly: fill twenty vials to 1.0 mL with methanol, puncture each a set number of times with a 22-gauge needle on a fixed autosampler, then weigh after a 24-hour hold at 25 °C.
| Septum type | Thickness | Punctures | Mean loss, 24 h at 25 °C | Re-seal quality |
|---|---|---|---|---|
| Silicone, no face | 1.0 mm | 1 | 0.4 mg | Good |
| Silicone, no face | 1.0 mm | 5 | 1.9 mg | Fair |
| Silicone/PTFE faced | 1.0 mm | 1 | 0.2 mg | Good |
| Silicone/PTFE faced | 1.0 mm | 5 | 1.1 mg | Fair to good |
| Bonded pre-slit silicone/PTFE | 1.0 mm | 5 | 2.6 mg | Poor (by design) |
The pattern is consistent. Unfaced silicone re-seals well on the first puncture and degrades with repetition. PTFE facing lowers the through-material rate but the PTFE film does not recover as cleanly, so the hole is a slightly larger leak path once it is open. Pre-slit septa are designed for autosamplers that cannot tolerate needle drag, and they leak more because the slit is a permanent opening. If your method holds vials for hours between injections, a pre-slit septum is the wrong choice unless the alternative is a bent needle.
Thicker is not automatically better. A 1.5 mm septum recovers more material around the hole but requires more crimp force to compress, and if the crimper cannot deliver it you get a loose seal and a worse result. Match the septum thickness to the cap and crimper you actually have, not to the thickest option on the page. If you source caps and septa as a set, the people at Vials With Caps will tell you which combinations are tested together, which saves you the trial-and-error.
Compression set is what kills a cap over a run, not the puncture
Compression set is the permanent deformation an elastomer takes when it is held under load. A septum compressed at 35% for 48 hours at 25 °C will not spring back to its original thickness when the load is removed. It stays thin. That matters because the cap torque or crimp that sealed the vial on day one is now sealing against a septum that has relaxed, and the contact pressure has dropped.
For screw caps, the practical number is torque. A 9 mm screw cap on a 12 x 32 mm vial is typically torqued to 0.4 to 0.6 N·m (roughly 3.5 to 5.3 in-lb). Below 0.4 N·m the septum is under-compressed and leaks around the edge. Above 0.8 N·m you risk cracking the neck finish or deforming the cap so it backs off. I have seen labs hand-tighten to the point of stripping threads because nobody had a torque wrench on the bench. A $40 preset torque driver fixes a problem that costs thousands in repeat runs.
For crimp caps, the equivalent control is crimp height. A correctly crimped 11 mm aluminum seal has a skirt height of about 4.0 to 4.3 mm measured from the top of the cap to the bottom edge. Below that the crimp is loose; above it the seal is over-crushed and the septum is deformed. A crimp gauge costs less than a column and belongs on every bench that crimps by hand.
Temperature accelerates set. Hold a vial at 40 °C for a week and the silicone takes a set that a 25 °C hold would take a month to produce. If your autosampler tray runs warm, or if your samples sit in a heated compartment, your compression set clock runs faster and your re-seal gets worse sooner. This is one reason Thermo Fisher’s sample handling guidance and every autosampler manual specify a tray temperature; the number is not decorative.
Measuring the loss gravimetrically: the only number that settles the argument
You cannot fix what you have not measured, and visual inspection does not catch a 4 mg loss. The gravimetric method is simple and it takes an afternoon. Here is the procedure I use.
- Condition the vials. Equilibrate empty, capped vials in the test environment for 30 minutes so the cap and septum are at the hold temperature before you fill.
- Fill to a fixed volume. Use a calibrated pipette to deliver the same volume to each vial, typically 1.0 or 1.5 mL for a 2 mL vial. Record the fill.
- Weigh immediately. Cap, then weigh each vial on a balance readable to 0.1 mg. Record the tare-plus-fill weight. Work fast so the first weigh is not already losing.
- Hold under your real conditions. Put the vials in the autosampler tray, the fridge, or the incubator at the temperature and duration your method actually uses. Do not shortcut this.
- Re-weigh at intervals. At 2, 8, 24, and 48 hours, pull each vial and weigh. The slope of the weight-versus-time line is your loss rate in mg per hour.
- Run a control. Include at least three vials sealed with a known-good cap and septum, and three deliberately under-crimped or under-torqued, so you can see the difference the seal makes.
Interpret the numbers against your method tolerance. A loss of 0.5 mg over 24 hours on a 1.0 mL fill is about 0.05% by volume and is usually acceptable. A loss of 2 mg is 0.2% and starts to matter for volatile analytes and for methods with tight internal standard criteria. A loss above 5 mg over 24 hours means the seal is failing and you should not trust the run.
If you want to convert weight loss to a vapor transmission rate for comparison across septum types, the calculation is straightforward: loss in mg divided by the exposed septum area in cm² divided by the hold time in hours gives mg·cm⁻²·h⁻¹. A 11 mm septum has an exposed area of about 0.6 cm². That normalises the number so you can compare a 1.0 mm and a 1.5 mm septum on the same basis. The Restek technical resources have published reference values for common septum materials that you can check your numbers against.
Two field cases where the measurement found the cause
Case one: the weekend hold that lost 9.8 mg
Symptom: three wells at 71% recovery after a 62-hour hold at 8 °C, with the rest of the plate at 96 to 99%. Measurement: gravimetric weigh before and after the hold showed a mean loss of 4.1 mg and a worst case of 9.8 mg. The worst vials were all from one crimp lot. Diagnosis: crimp height on that lot averaged 4.6 mm, above the 4.0 to 4.3 mm target, meaning the seal was over-crushed and the septum was deformed at the edge. The over-crush had also cracked two neck finishes, which we found under magnification. Fix: reset the crimper to 4.1 mm, added a crimp gauge to the bench, and re-ran the hold. Loss dropped to a mean of 0.6 mg and recovery came back to 97 to 99%. The crimper had drifted because nobody had checked it in eighteen months.
Case two: the screw cap that backed off at 40 °C
Symptom: a stability study at 40 °C / 75% RH showed increasing assay drift from week two onward, with the drift concentrated in the low-concentration samples. Measurement: torque audit found the caps had been hand-tightened to an average of 0.22 N·m, well below the 0.4 N·m minimum. Gravimetric loss over 7 days at 40 °C averaged 6.3 mg per vial. Diagnosis: under-torque plus compression set at elevated temperature. The septum had relaxed, the cap had lost contact pressure, and the seal opened. Fix: switched to a preset 0.5 N·m torque driver, moved to a PTFE-faced septum for the elevated-temperature hold, and re-qualified. Loss fell to 1.2 mg over 7 days. The assay drift disappeared.
Both cases had the same shape: a number nobody was tracking, a slow drift, and a fix that cost less than a day of instrument time. Neither would have been caught by looking at the vials.
A troubleshooting checklist for seal failure and loss
When a run drifts or recovery falls, work this list in order. It is sorted by how often each item is the actual cause in my experience.
- Check the crimp or torque first. Crimp height 4.0 to 4.3 mm on 11 mm seals; screw cap torque 0.4 to 0.6 N·m. Measure ten vials, not one.
- Inspect the neck land. 10x magnification, look for chips, seams, and out-of-square lands. Reject the lot if more than 1 in 50 is defective.
- Confirm septum thickness matches the cap. A 1.5 mm septum in a cap designed for 1.0 mm will not compress correctly.
- Count punctures per vial. If a vial sees more than three injections, expect measurable loss. Cap the puncture count in your method.
- Check needle condition. A burred or bent needle tears the septum. Replace at the first sign of drag.
- Verify tray temperature. Every 10 °C above 25 °C roughly doubles the diffusional loss and speeds compression set.
- Run the gravimetric test. If the loss rate exceeds your method tolerance, change the cap and septum combination, not the instrument method.
- Audit the lot. If one lot fails and the previous lot passed, the problem is incoming, not in your lab.
The checklist assumes your septa are not shedding material into the vial; if you are also seeing ghost peaks, that is a separate problem owned elsewhere and I will not rehash it here. Seal integrity and particulate contamination are different failure modes with different fixes.
What to specify so the seal holds
When you write the specification for the next purchase order, put these numbers on it. They are the ones that decide whether the seal holds over a run.
- Vial: 12 x 32 mm, 2 mL, borosilicate glass, neck finish per GPI 13-425 for screw or 11 mm for crimp.
- Septum: silicone/PTFE faced, 1.0 mm, for methods with volatile analytes or holds over 24 hours. Unfaced silicone only for short holds and non-volatile analytes.
- Cap: aluminum crimp with 4.0 to 4.3 mm crimp height target, or screw cap torqued to 0.4 to 0.6 N·m.
- Temperature rating: confirm the septum is rated for your hold temperature, not just the autosampler ambient. A 40 °C stability hold needs a septum rated above that.
- Puncture count: specify a maximum per vial in the method, typically three for silicone/PTFE.
- Lot acceptance: require a gravimetric loss certificate or run your own incoming check on the first ten vials of each lot.
If you are sourcing across a network, the chromatography products side of the business and the consumables side should be talking to each other, because the septum choice interacts with the injection volume and the needle gauge. Manufacturers who publish their septum compression and re-seal data, like Aijiren, make the specification easier because you are not guessing at the numbers. And if your work falls under a regulated method, check the hold and storage requirements against the relevant EPA SW-846 method text, which specifies holding times that your seal has to survive.
The decision rule
If you cannot state the gravimetric loss rate of your current vial, cap, and septum combination under your actual hold conditions, you do not know whether your seal is holding and you should measure it before the next run. Specify crimp height at 4.0 to 4.3 mm or torque at 0.4 to 0.6 N·m, match septum thickness to the cap, cap the puncture count per vial, and re-check the lot whenever the supplier changes. The number on the balance is the only one that tells you the truth about a sample vial seal failure, and it costs an afternoon to get it.
References & further reading
Related resources from our lab consumables network:
- Sample Vial at samplevialprice.com
- Chromatography Products at chromatographyselling.com
- Aijiren at aijirentech.com
- Vials With Caps at vialswithcaps.com
External references and standards: